
Storing images in SQL Server with RIA Services
Published on Sunday, March 6, 2011 11:39:00 PM UTC in
Programming

In the Silverlight forums people frequently ask for help with storing images in their databases using RIA Services. Even though this looks like a pretty common thing to do, it is far from being straight forward, and searching the web does not seem to produce any good results (or I'm just doing it wrong). So I decided to write this quick walk-through of how to do that. This post describes all steps and possible pitfalls to create a complete application for this from scratch, from the database to the UI.
Note: a follow-up post with some optimizations can be found here.
Table of contents:
- Preface
- Setting up the project
- Creating the model
- Setting up the image entity
- Setting up the image data entity
- Setting up the relation
- Creating the database
- Problems with the database generation/rework
- Creating the domain service
- Downloading MVVM Light with NuGet
- Creating a simple client UI
- Extending the client side model
- Conversion of the images
- The view model
- Loading the available images
- Loading the selected image's data
- Deleting images
- Adding new images
- Further considerations
- Potential problems
- Summary and source code download
I am not a DBA. Those DBAs I know frown upon things like storing images as blob data in the database. The preferred solution everybody seems to recommend is to only store the meta data in your database and link that to a file in the file system. But still, I did come across situations where I had to design a system like that, for example if a customer had a demand for it out of whatever reasons. Also, it's not true that blob storage in the database is worse than using the file system in any case. If you are interested in more details on the topic, I recommend the following report from Microsoft Research: To blob or not to blob? It claims that for objects of size 256 KBytes or lower storing the binary data in the database has clear advantages over the file system, for sizes of 1 MB or more the file system is a better choice. Inside that range, it depends on the scenario. That report is from 2006 and I very much believe that the situation has not worsened for the database storage since that time.
So, whether the way provided here is suitable for you or not solely depends on your project environment and own research, I don't make any recommendations on this. I also will not make any performance optimizations or similar in this post, it is just meant as a demonstration of how the basic mechanism works, with focus on the client side and middleware.
I am using the Silverlight business template to create my application from scratch:
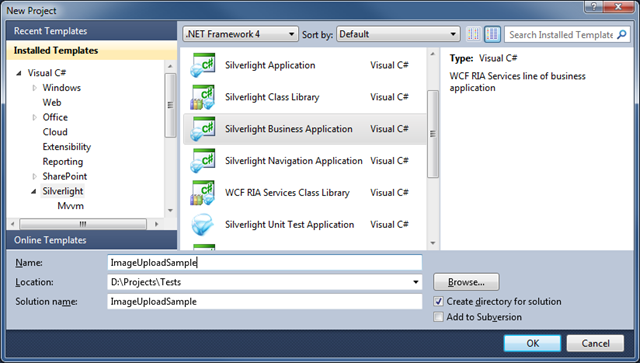
This is the quickest way to set up a new solution that is pre-configured for RIA Services and already has a some UI to start with.
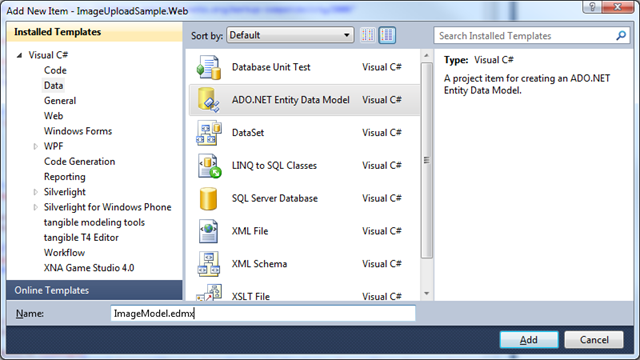
Before we start the actual coding, I want to create the database model. To this end, I add a new Entity Data Model to the "Models" folder of the server-side web application project.
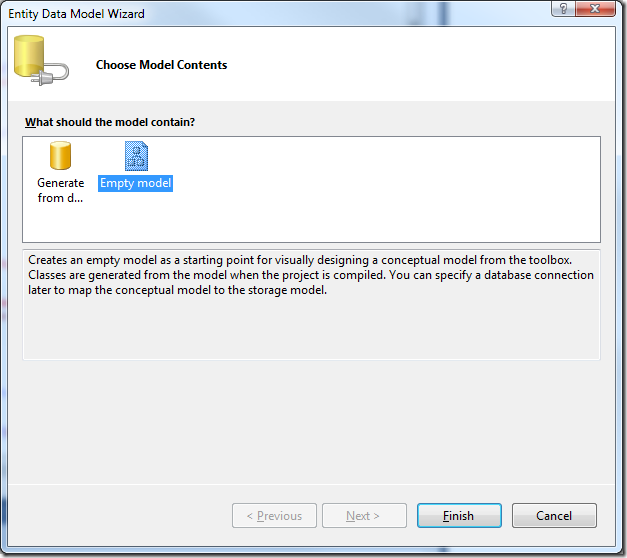
Since I don't have the database yet, I'm creating an empty model.
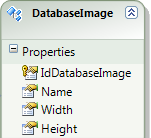
In the designer of the data model, I can then use the toolbox to drag and drop an entity for my image to the model, like:

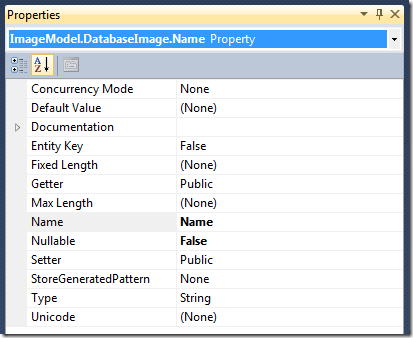
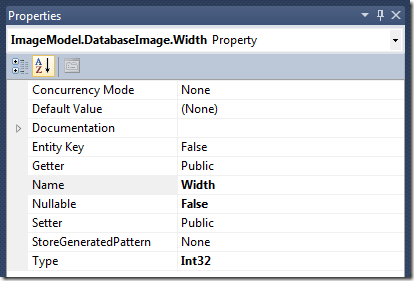
I then need to set up all required properties for the entity. First of all, I rename "Id" to "IdDatabaseImage" and set the following values for it:

I like to work with Guids as keys, but you can also use whatever other type you usually prefer.
When you right-click the entity, you have the option to add new properties to it. Do that by choosing "Add.../Scalar property" to add the Name field for the image entity. This will contain the image name later:
Next come properties for both the width and height of the image (in pixels). We'll see why we need those properties later on. Both are set up in the same way:
This concludes the DatabaseImage entity so far.
You may wonder where the actual image data is stored. The answer is: not in this table.
I decided to put the image data in a separate table. The decision with that was primarily driven by how I expect to retrieve the data later through the service, but it might also have performance benefits to do this. So drag and drop a second entity onto the surface of the designer and name it DatabaseImageData:
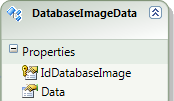
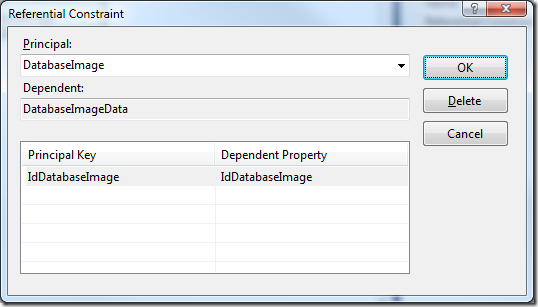
One special thing to note here is that we will use the same primary key (IdDatabaseImage) like for the image entity. This is required to set up a 1:1 relationship between both entities (each image entity will have exactly one data entity). The other property is simply named "Data" and holds the binary data of the image:
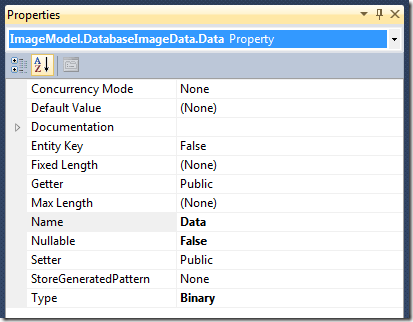
Important: If you do not set up your database the way we do here, but create it in your database maintenance tool or by script etc., then make sure you use the "varbinary(MAX)" type for the "Data" column in SQL Server. People are tempted to use the "Image" data type because after all, that is what they want to store, right? The problem is that this data type is deprecated and the documentation explicitly states not to use it anymore (see here). Make sure to follow that recommendation to avoid problems in the future.
To configure the relation, select the "Association" entry in the toolbox, and then drag an association from one entity to the other. Make sure that when you select the link in the designer, the configuration looks like this:
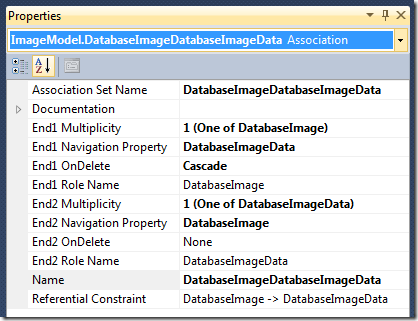
The following screenshot shows the Referential Constraint configuration:
This concludes the setup of the data model. It should now look like this:

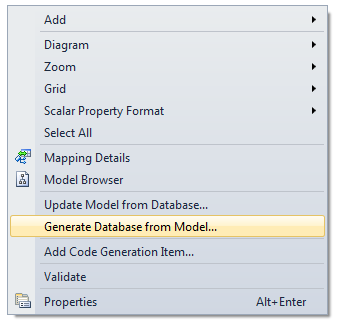
At the moment, we only have defined the model, but we do not have a backing database that implements that model. We'll create that database now. Right-click anywhere in the designer and select "Generate Database from Model...":
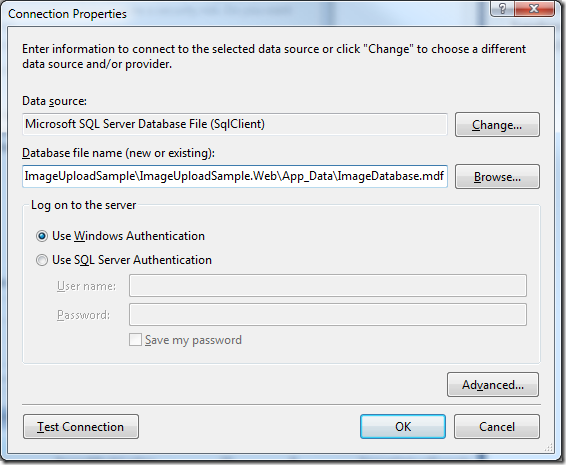
In the following dialog, you can set up the connection to your database server and select a database name. If you choose "New Connection..." you are also able to change the data source to "Microsoft SQL Server Database File (SqlClient)" which allows you to create a new local MDF file that typically is located in the "App_Data" folder of your web application. I chose that option in the following screenshot:
When you click "OK" you are asked if you want to create the new database file, and then are presented with the connection string details in the main wizard screen. Make sure to check the option to store the connection string in your web config:

Click "Next", then "Finish", and a generation script will have been created for you in your "Models" folder. The script file will automatically be opened for you, and the last step to perform is to actually execute the SQL script through the toolbar button, by right-clicking and selecting "Execute SQL", or simply by pressing Ctrl + Shift + E.
I found two glitches when you're working with a local database file instead of an instance in SQL Server:
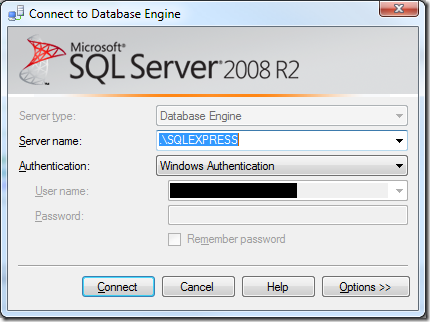
- When you try to execute the SQL script, you are asked to set up the connection and will find that you can only connect to an SQL Server, and if you do that, the database from your local file will not be available in the list of databases. To work around that, do the following in the connection dialog:
 Select "Options" here, and then add the following custom parameters:
 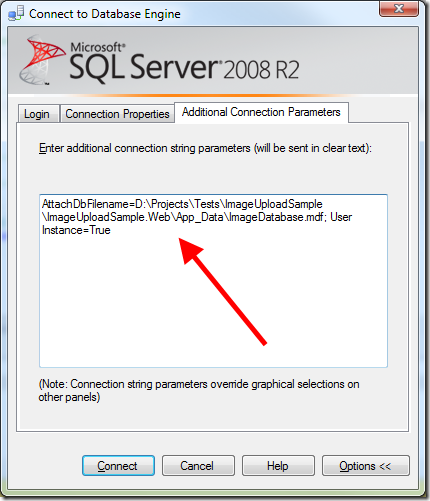 That is: use "AttachDbFilename" to specify the path to your database file, and also add "User Instance=True" to the parameters. This is very similar to what can be found in the connection string that was saved to your web.config file, with the difference that you have to expand the "|DataDirectory|" alias with the real path to your database file. Once you have done that, connecting should be possible.
 - When you execute the SQL script, you may receive the following error message:
Msg 911, Level 16, State 1, Line 1Database 'ImageDatabase' does not exist. Make sure that the name is entered correctly.The reason for this is that the script tries to select the correct database in the beginning. Since you've attached the database file with only the single correct database in it, you have to remove these two lines from the generated script:USE [ImageDatabase];GOAfter that, the script should execute without any errors.
Once created, you can check whether everything went right by using the Server Explorer window to inspect your database. You may need to refresh the connection to the database to see the newly created tables.
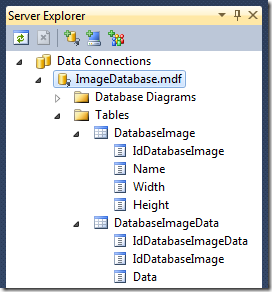
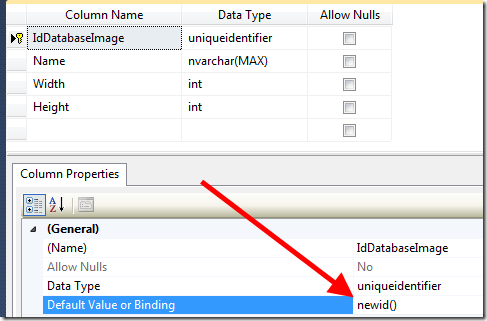
Another thing left to do is to create some auto-generate option for the identity column if you don't want to manually generate the GUIDs. To do so, you can double-click the "DatabaseImage" table in server explorer, and then select the "IdDatabaseImage" column. This will bring up the properties window, where you can set "newid()" as the default value.
Save, and that's it! The database is set up and we can proceed to actually creating the service.
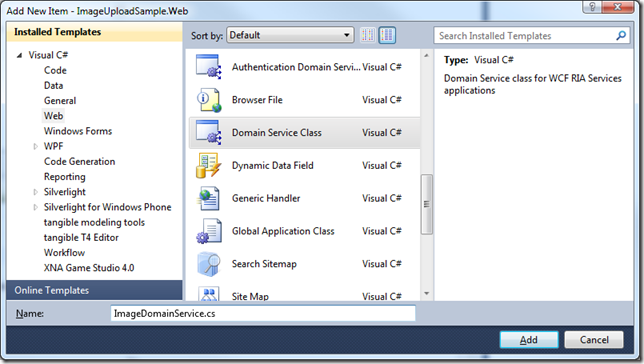
To create the service, I add a new domain service class to the "Services" folder of the web application project. Make sure to compile the project before you do that, to ensure that the entity model is available for selection in the domain service wizard.
For both the image and image data tables, we enable full editing:

I leave all the generated methods as they are, except the two query methods:
public IQueryable<DatabaseImage> GetDatabaseImages()
{
    return this.ObjectContext.DatabaseImage;
}

public IQueryable<DatabaseImageData> GetDatabaseImageDataByImageId(Guid imageId)
{
    return this.ObjectContext.DatabaseImageData.Where(o => o.IdDatabaseImage == imageId);
}
I only renamed the first one to reflect the fact that we are retrieving multiple images. The second method however now takes an argument that filters the image binary data that is returned by the id of a particular image (which effectively limits the query to only return data for one image at a time).
That is actually all that is needed for the service. Let's move on to the client side!
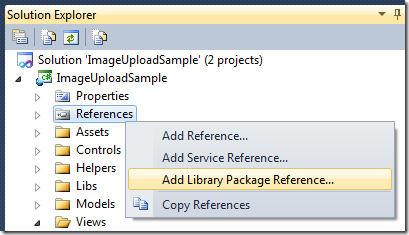
Before we actually start, I will use NuGet to download the MVVM Light libraries I want to use to make creation of the client easier in an MVVM style. If you don't have NuGet installed you can get it here. It allows easy access to all kinds of cool projects and allows you to add their required assemblies directly from within Visual Studio. Right-click the client project's "References" folder and select the right command:
In the following dialog, select "Online" on the left side, then you can use the search box at the top right to look for "mvvm". MVVM Light is among the top hits. Select it and click "Install".

After a short download, you will see that all required references have been added to your project automatically.
The client UI will be separated into two columns: the left one shows the currently selected image and some additional data like the name and dimensions, whereas the right side will show the list of available images and some buttons that allow the user to add new images from their local drive as well as delete existing ones. I use the existing "Home" view of the project to add these elements.
<Grid x:Name="LeftGrid"
        Grid.Row="1">
    <Grid.RowDefinitions>
        <RowDefinition Height="Auto" />
        <RowDefinition Height="Auto" />
        <RowDefinition Height="*" />
    </Grid.RowDefinitions>

    <TextBlock Text="{Binding SelectedImage.Name}"
                HorizontalAlignment="Center" />
    <TextBlock Grid.Row="1"
                Text="{Binding SelectedImage.Dimensions}"
                HorizontalAlignment="Center" />
    <Image Grid.Row="2"
            Source="{Binding SelectedImage.Bitmap}"
            Stretch="Uniform" />
</Grid>
If you read the above code carefully you can see that we're binding to properties named "Dimensions" and "Bitmap" which are not actually part of the entity type. We'll add these as client side properties in a moment.
<Grid x:Name="RightGrid"
        Grid.Row="1"
        Grid.Column="1">
    <Grid.RowDefinitions>
        <RowDefinition Height="*" />
        <RowDefinition Height="Auto" />
    </Grid.RowDefinitions>

    <ListBox ItemsSource="{Binding AvailableImages}"
                SelectedItem="{Binding SelectedImage, Mode=TwoWay}"
                MinWidth="200">
        <ListBox.ItemTemplate>
            <DataTemplate>
                <StackPanel>
                    <TextBlock Text="{Binding Name}" />
                    <TextBlock Text="{Binding Dimensions}" />
                </StackPanel>
            </DataTemplate>
        </ListBox.ItemTemplate>
    </ListBox>

    <StackPanel Grid.Row="1">
        <Button Content="Upload image from disk"
                Click="UploadImageButton_Click" />
        <Button Content="Delete current image"
                Command="{Binding DeleteCurrentImageCommand}" />
    </StackPanel>
</Grid>
</Grid>
Apart from the list box that shows the images, the right side binds some buttons to commands in the view model we're about to create.
As I said, we need to add additional properties to the client side generated class that transforms some of the image's data for display. To this end, I add a new partial class definition for the DatabaseImage type to the "Models" folder and add the following code:
namespace ImageUploadSample.Web.Models
{
    public partial class DatabaseImage
    {
        private WriteableBitmap _bitmap;

        public WriteableBitmap Bitmap
        {
            get
            {
                return _bitmap;
            }
        }

        public string Dimensions
        {
            get
            {
                return string.Format("Dimensions: {0}x{1}", Width, Height);
            }
        }

        ...
Please note that I had to change the namespace to match the namespace of the server side to make the partial declaration work. The new "Dimensions" property simply uses the width and height of the image to return a formatted string, whereas the "Bitmap" property is backed by an own field. As you can see, this property doesn't have a setter. That is because we will have to do some additional lifting to handle the bitmap.
This is one of the crucial parts of the whole app. As you know, the server side model requires a chunk of binary data as image data. The client however wants to work with some sort of bitmap object that can be easily used to display and work with the images. That means that at some point some kind of conversation needs to be performed both ways. There are several possibilities to do this, but I decided to integrate it with the client generated entity class to make it easier to use with data binding.
For the conversion process, I use the WriteableBitmapEx library in this example. Unfortunately there's no NuGet package available for it yet, so you have to download it from the project site and add a reference to the assembly to your project manually. The library provides a set of extension methods for the WriteableBitmap type, so you can directly start using it when you're working with these bitmaps without the need to create additional objects or similar. If you want to learn more about how the library performs basic conversion from and to byte arrays, read this blog post by its author René Schulte.
The first conversion necessary is from the byte array we receive from the server to a bitmap we can use for the property we've just created. Unfortunately the client-side generated code - unlike for the simple properties - does not contain extension points for the image data relationship. So I decided to create a public method for this conversion and invoke it manually when it is required.
public void RefreshBitmap()
{
    // if we don't have image data, we cannot create a bitmap
    if (DatabaseImageData == null || DatabaseImageData.Data == null)
    {
        _bitmap = null;
    }
    else
    {
        // create a new bitmap and restore it from the binary data
        _bitmap = new WriteableBitmap(Width, Height);
        _bitmap.FromByteArray(DatabaseImageData.Data);
    }

    RaisePropertyChanged("Bitmap");
}
Now you can see why we need to store the width and height separately in the database. This information cannot be restored from the binary chunk and needs to be provided when we create the empty writeable bitmap.
The other conversion we are offering is from a bitmap to the byte array. This is required when the user wants to add a new image to the database. We will then take the image that was loaded from disk and convert it to the binary format required to store it in the database. Again this is added as a public method to the existing client-side entity code:
public void SetBitmap(WriteableBitmap bitmap)
{
    if (bitmap == null)
    {
        throw new ArgumentNullException("bitmap");
    }

    // store the reference
    _bitmap = bitmap;

    // update our own properties
    Width = _bitmap.PixelWidth;
    Height = _bitmap.PixelHeight;

    // get or create related image data entity
    DatabaseImageData imageData = DatabaseImageData;
    if (imageData == null)
    {
        imageData = new DatabaseImageData();
        DatabaseImageData = imageData;
    }

    // convert the image to a byte array
    imageData.Data = _bitmap.ToByteArray();

    // notify the outside world
    RaisePropertyChanged("Bitmap");
}
This is all that is required for the conversion. We can now focus on creating the view model which is used to bind the UI.
I add the view model for the home view to a new ViewModels folder and create some stubs for now. The empty view model without any added functionality so far looks like this. First some of the required properties and fields for the collection of images, the currently selected image, and a domain context for the communication with the domain service. Please note that we pass through the entity set of the images from the domain context to the UI here.
private ImageDomainContext _ctx;
private DatabaseImage _selectedImage;

/// <summary>
/// The images available on the server.
/// </summary>
public IEnumerable<DatabaseImage> AvailableImages
{
    get
    {
        return _ctx.DatabaseImages;
    }
}

/// <summary>
/// Gets or sets the selected image.
/// </summary>
public DatabaseImage SelectedImage
{
    get
    {
        return _selectedImage;
    }
    set
    {
        if (_selectedImage != value)
        {
            _selectedImage = value;
            RaisePropertyChanged("SelectedImage");

            LoadImageData();
        }
    }
}
You can also see that the setter of the selected image calls a method "LoadImageData". The idea behind that is to ensure we have the actual image on the client whenever the selected image changes. For example, when the user clicks a new entry in the list box, we will reach out to the service and download the associated image for that entry. We'll see the implementation details below.
Next we have some commanding stuff in the view model:
/// <summary>
/// Gets or sets the add new image command.
/// </summary>
public ICommand AddNewImageCommand
{
    get;
    set;
}

/// <summary>
/// Gets or sets the delete current image command.
/// </summary>
public ICommand DeleteCurrentImageCommand
{
    get;
    set;
}
And finally the constructor that sets up some of the basic things, like creating the actual commands:
/// <summary>
/// Initializes a new instance of the <see cref="HomeViewModel"/> class.
/// </summary>
public HomeViewModel()
{
    _ctx = new ImageDomainContext();
    AddNewImageCommand = new RelayCommand<FileInfo>(AddNewImage);
    DeleteCurrentImageCommand = new RelayCommand(DeleteCurrentImage);

    LoadAvailableImages();
}

private void LoadAvailableImages()
{
    // TODO
}
To make use of the view model, I create it directly in the XAML of the home view. This can be done by adding an xml namespace that points to the where the view model is located, and then add the view model as the data context of the view.
xmlns:viewModels="clr-namespace:ImageUploadSample.ViewModels"
<navigation:Page.DataContext>
    <viewModels:HomeViewModel />
</navigation:Page.DataContext>
Now we are ready to look at the implementation details of the individual actions.
This is really straight-forward. We only trigger the async load operation to fetch all the available images from the service. Since the UI already binds to the entity set of the domain context, we don't have to do anything when the call returns (unless something went wrong of course). All I've added is the attempt to pre-select the first image in the set so we have an initial image displayed in the client.
private void LoadAvailableImages()
{
    // simply load all the available images
    _ctx.Load(_ctx.GetDatabaseImagesQuery(),
        o =>
        {
            if (o.HasError)
            {
                ErrorWindow.CreateNew("Error while loading available images: "
                    + o.Error.ToString());
                o.MarkErrorAsHandled();
            }
            else
            {
                // try to select the first image, if possible
                SelectedImage = _ctx.DatabaseImages.FirstOrDefault();
            }
        }, null);
}
The important thing to remember is that fetching these entities does not include the actual image data. All we retrieve here is the image names as well as their width and height properties.
When the user selects one of the image entries in the list box, or if we set the respective property in code, the "LoadImageData" method is invoked to make sure we have the actual image for display. That methods looks like the following:
private void LoadImageData()
{
    // no selected image, no data
    if (SelectedImage == null)
    {
        return;
    }

    if (SelectedImage.Bitmap != null)
    {
        // we already have the bitmap,
        // no need to load anything
        return;
    }

    // store as reference
    var image = SelectedImage;

    // load the image data by using the id to select the correct one
    _ctx.Load(_ctx.GetDatabaseImageDataByImageIdQuery(image.IdDatabaseImage),
        o =>
        {
            if (o.HasError)
            {
                ErrorWindow.CreateNew("Error while loading image data: "
                    + o.Error.ToString());
                o.MarkErrorAsHandled();
            }
            else
            {
                // let the image build the bitmap
                // from the raw byte[]
                image.RefreshBitmap();
            }
        }, null);
}
First of all we of course check if there actually is a selected image. Then we see if we already have the bitmap for this image, and do not hit the service again if it's already there.
The rest of the code simply invokes the load operation for the image data based on the Id of the selected image. Once the image was downloaded without errors, we call the "RefreshBitmap" method that we wrote above, so the actual bitmap can be build from the byte array we received. The UI will pick up the newly created bitmap through the data binding we set up in XAML.
To remove images from the database, we simply remove them from the client entity set and then save the changes back to the service. The setup ensures that when we remove an image, the binary image data in the related table is removed automatically too.
private void DeleteCurrentImage()
{
    if (SelectedImage = null)
    {
        return;
    }

    // only delete images that are modifed or unmodified
    if (SelectedImage.EntityState == EntityState.Modified
        || SelectedImage.EntityState == EntityState.Unmodified)
    {
        // remove the image from the entity set
        // note: the way we set up the database and relation
        // will cause the image data for this image to be
        // deleted too.
        _ctx.DatabaseImages.Remove(SelectedImage);

        // save the changes
        _ctx.SubmitChanges(o =>
            {
                if (o.HasError)
                {
                    ErrorWindow.CreateNew("Error while deleting image: "
                        + o.Error.ToString());
                    o.MarkErrorAsHandled();
                }
                else
                {
                    // try to select another image
                    SelectedImage = _ctx.DatabaseImages.FirstOrDefault();
                    MessageBox.Show("Image successfully deleted.");
                }
            }, null);
    }
}
This method is the action used for the respective command that is exposed by the view model and used by the delete button for binding. After the deletion, we try to select another image from the set, if there are images left.
For the upload functionality, we actually have a small amount of code in the code behind file of the view to show the file open dialog.
private void UploadImageButton_Click(object sender, System.Windows.RoutedEventArgs e)
{
    // show an open file dialog
    OpenFileDialog dlg = new OpenFileDialog();
    bool? result = dlg.ShowDialog();

    if (result.HasValue && result.Value)
    {
        // if the user has chosen a file,
        // invoke the view model
        var vm = DataContext as HomeViewModel;
        vm.AddNewImageCommand.Execute(dlg.File);
    }
}
The reason for this is that I do not want to show a dialog directly from the view model, which is something you should avoid in general to ease testing and leave more flexibility to the designers. For this simple example, I refrained from creating an overly complex sample that also gets rid of this code-behind.
The command implementation itself looks like this:
private void AddNewImage(FileInfo info)
{
    // first create the bitmap
    BitmapImage image = new BitmapImage();
    image.SetSource(info.OpenRead());
    WriteableBitmap bmp = new WriteableBitmap(image);

    // create database image
    DatabaseImage databaseImage = new DatabaseImage();
    databaseImage.Name = info.Name;
    databaseImage.SetBitmap(bmp);

    // add it to the images collection
    _ctx.DatabaseImages.Add(databaseImage);

    // save the changes back to the service
    _ctx.SubmitChanges(o =>
    {
        if (o.HasError)
        {
            ErrorWindow.CreateNew("Error while uploading image: "
                + o.Error.ToString());

            // if saving failed, remove the new image
            _ctx.DatabaseImages.Remove(databaseImage);
            o.MarkErrorAsHandled();
        }
        else
        {
            // select the new image
            SelectedImage = databaseImage;
            MessageBox.Show("New image uploaded successfully.");
        }
    }, null);
}
What this does is create the actual bitmap from the selected file first. Then a new entity is created for the image. We use the file name as name, and then call the "SetBitmap" method we have implemented above to convert the bitmap to the byte array that we need to store the image in the database.
After the new image entity is added to the correct entity set of the domain context, all that is left is save the changes to actually transfer all the image data to the service and store it in the database. Once that has happened successfully, we pre-select the newly added image in the UI.
One thing that is pretty important is to always keep in mind the amount of data that is to be transferred and stored. When you load an image from disk and convert it this way, an uncompressed bitmap is created in memory. That means that e.g. JPGs (and in some cases it's a lot more dramatic with PNGs) that only occupy a few kilobytes on disk easily can become several megabytes in size in memory. Here are some options what you can do:
- Store the original file to the database instead of creating a bitmap first. Since this means you leave it to the user to prepare the file with a sufficient encoding and/or compression, you can restrict the size of the files that can be selected to have some control over it.
- Use a sophisticated image library to compress the images that are selected by the user yourself. A pretty good tool for Silverlight regarding this is the ImageTools project. You will gain a lot when you compress the images to PNG or JPG first and then convert it to an memory stream and byte array for upload afterwards. The drawback of course is that you'll lose quality in the recompression process if the user has selected an image that already was compressed by a lossy compression.
- Downsize the images to save storage space.
I will post a follow-up article on this topic that improves the image handling by using a combination of the above mentioned methods soon.
2011-03-17: I have posted a follow-up article on this topic that shows how to improve and optimize the image handling here.
This application has the same restrictions like any other WCF/RIA Service, which means there are certain default limits you may run into when the size of the images to be transferred becomes too big. One particular setting in the server side web.config is the maximum request length in the "system.web" section. This limits the maximum size of requests that can be made by a client to 4 MB by default. So if you run into problems and receive client side errors these configuration settings are the things to check first.
<httpRuntime maxRequestLength="10240" />
This for example sets the maximum size for your image upload to 10 MiB. You should not set this to an extremely high value though. Those limits are there for a reason, for example to prevent or at least make it more difficult to attack your service/server.
This concludes the sample application. It is fully functional as in the user can select images from the local disk and upload them to the service where they are stored in the database. The user can retrieve a list of all images in the database and download them to the client for watching, and they can delete existing images from the database. Of course this is still only a sample and is missing a lot of potential features. But I hope it is able to give an overview of the involved concepts and what one has to do to get this up and running easily. You can download the source code of the whole application here:
Tags: Entity Framework · RIA Services · Silverlight