
Installing Windows 8 Developer Preview in a virtual machine
Published on Wednesday, September 14, 2011 7:24:00 AM UTC in
Tools

So, after getting up in the middle of the night to be among the first to download the developer preview of Windows 8, the question was where to install it to once it was downloaded. I wanted to use it in a virtual machine first to play around with it before I proceed with installing it on real hardware. During the download, I had enough time to read through a lot of tweets from people with failed attempts to install it in virtualized environments, including Virtual PC, VMware, Parallels and VirtualBox. However, there also were a few success messages for the latter one, so I decided to try VirtualBox first. That seemed a logical choice; unless you downloaded the 32-bit version of Windows 8 (don't you dare! No development tools! :)), you need a virtualization software that supports 64-bit guest operating systems, and VirtualBox - in contrast to e.g. Virtual PC - does that.
Getting started
First of all, if you haven't done this yet, go ahead and download the developer preview. There are several choices, but since we want to develop applications and use the fancy new tools like Visual Studio 11 and Expression Blend 5, use the 64-bit package with developer tools.
Then of course you need to have VirtualBox installed, which you can get for free from here. Installation of it is straight forward using the wizard that comes with the installer. Please note that you will be prompted several times to install drivers required by the software.
Create a Virtual Machine
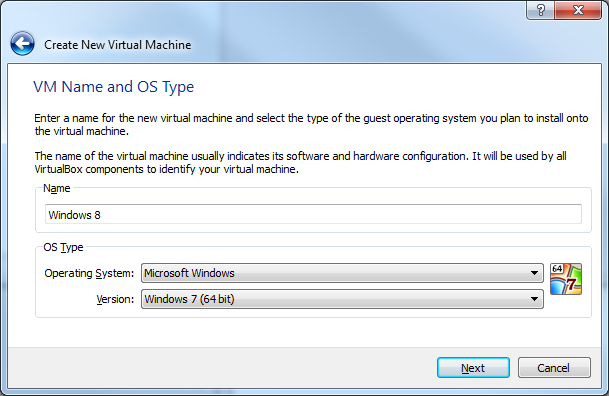
The first step in the setup is to create a virtual machine that hosts Windows 8. VirtualBox launches a step-by-step wizard for this that guides you through the process of configuring the individual aspects of that machine. Since VirtualBox has no official support for Windows 8 yet, go ahead and choose "Windows 7 (64-bit)" from the drop-down list:
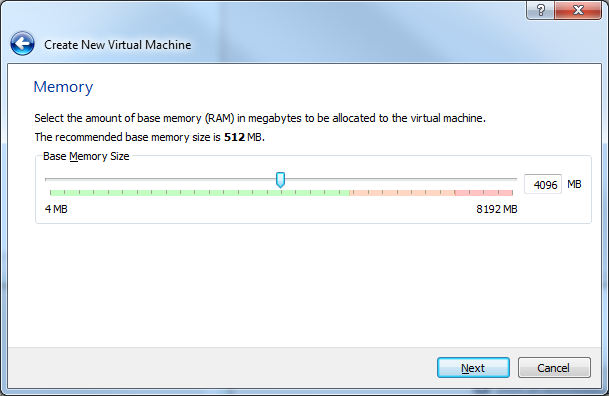
The next screen allows you to set the amount of memory (RAM) you want to allocate for the machine. The recommendation for the Windows 8 developer preview is 2 GB for the 64-bit version (as found on the download page). Since I want to do some development experiments, which means running Visual Studio and Blend, I upped that to 4 GB:
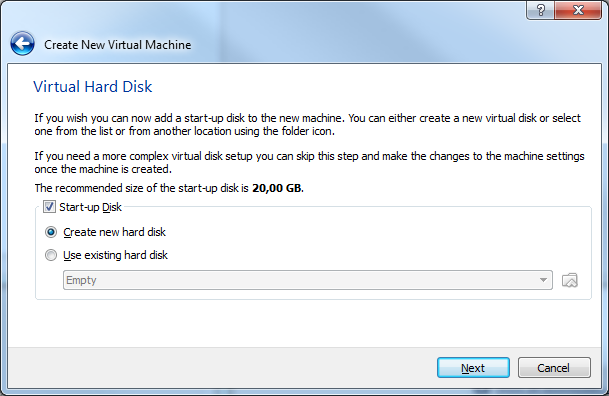
Step three involves setting up a virtual hard disk for the machine. Not much to choose here:
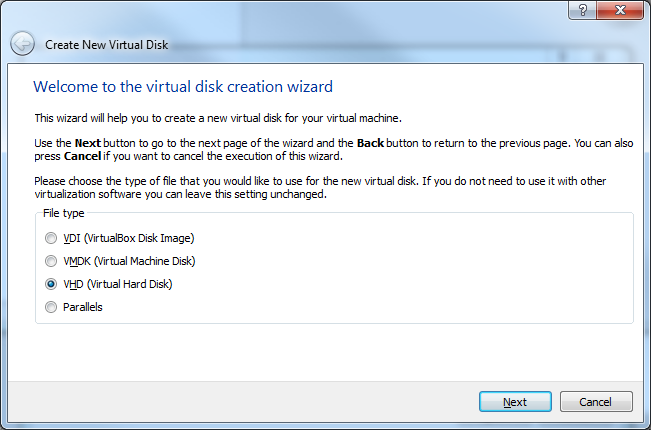
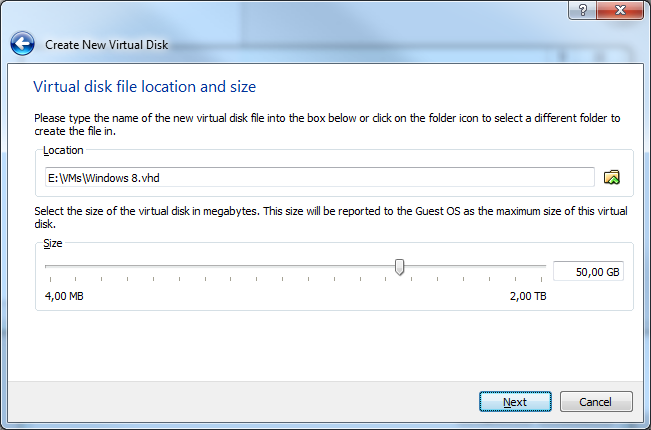
I chose VHD as format for the disk, which is the standard format Microsoft uses. I'm not sure if it would've made any difference to use the VirtualBox default format.
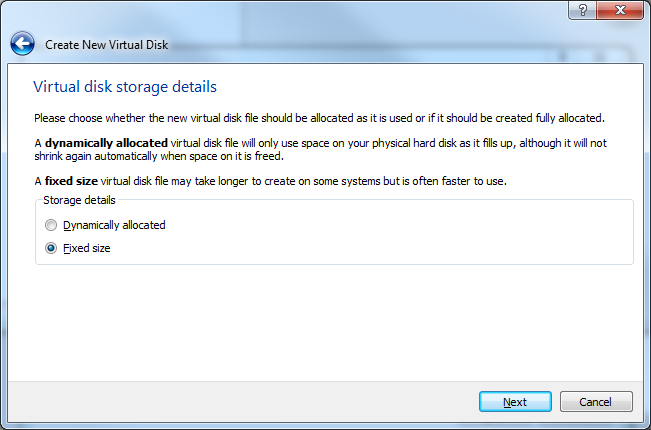
For virtual hard disks I use fixed sizes, which should be faster than using the dynamic allocation; and speed is a very important factor for something as resource hungry as virtualization.
Regarding the disk size, the recommended free space is 20 GB for the 64-bit version of Windows 8. Again I'm someone who likes to be on the safe side, so I used 50 GB:
That's the last step required. Finishing the wizard creates the hard disk, which may take a while for 50 GB - a good time to read more of the developer guide PDF Microsoft provides for the preview :).
Configuration of the Virtual Machine
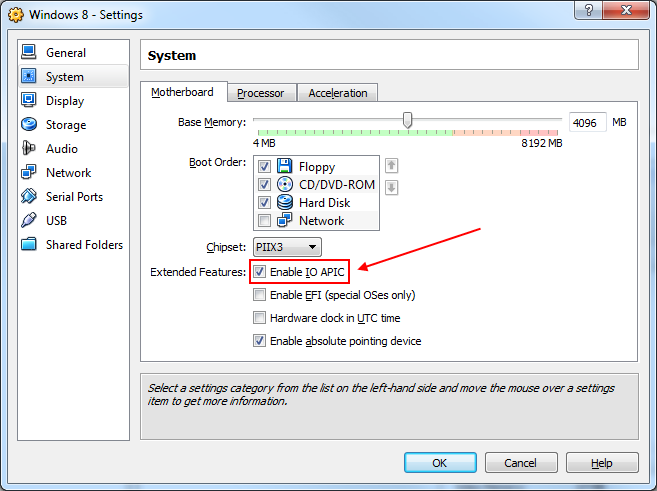
Before you go ahead and start installing Windows 8 into the machine, first make sure that it is configured correctly. Aside from e.g. configuring the place snapshot data should be saved to, the number of CPUs and other convenient parameters, there are some vital options that you should inspect to make sure they're set up correctly. For example, make sure that the I/O APIC option is selected:
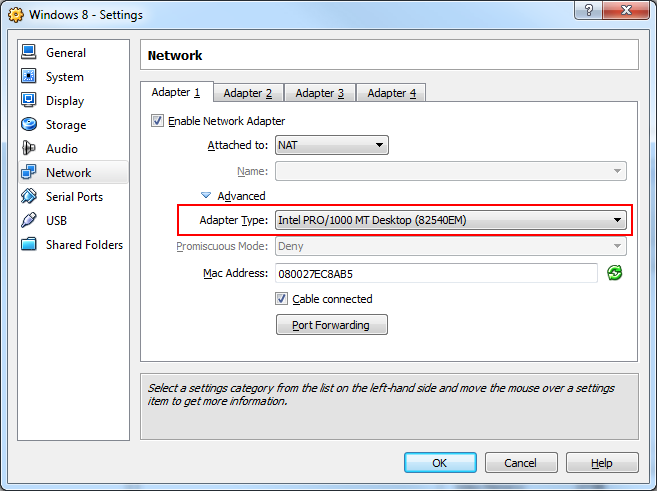
Also, make sure that the network adapter type is set to Intel, as there are no 64-bit drivers for the other ones:
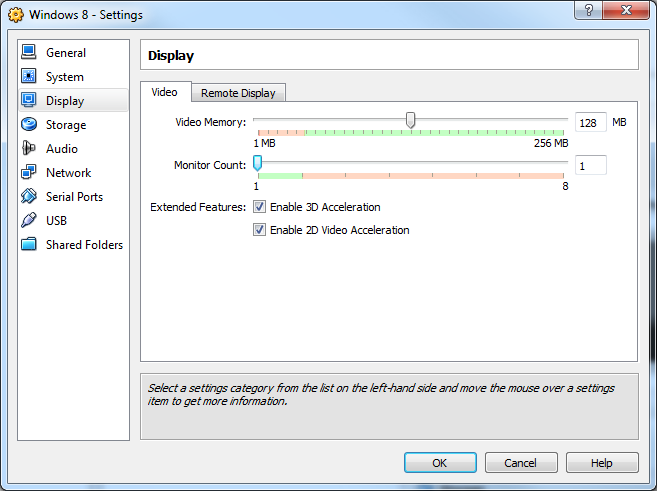
One thing that could be helpful is to turn on acceleration for 2D and 3D graphics:
Of course you want to boot off of the DVD image you've downloaded from Microsoft, so the final step is to set this up on the "Storage" tab:

Choose the developer preview ISO file you've downloaded.
Now you're ready to power on the virtual machine using the "Start" option from the toolbar.
Installing Windows 8
The installation should look pretty familiar to you if you have installed any Windows version manually before, in particular Windows 7 of course.
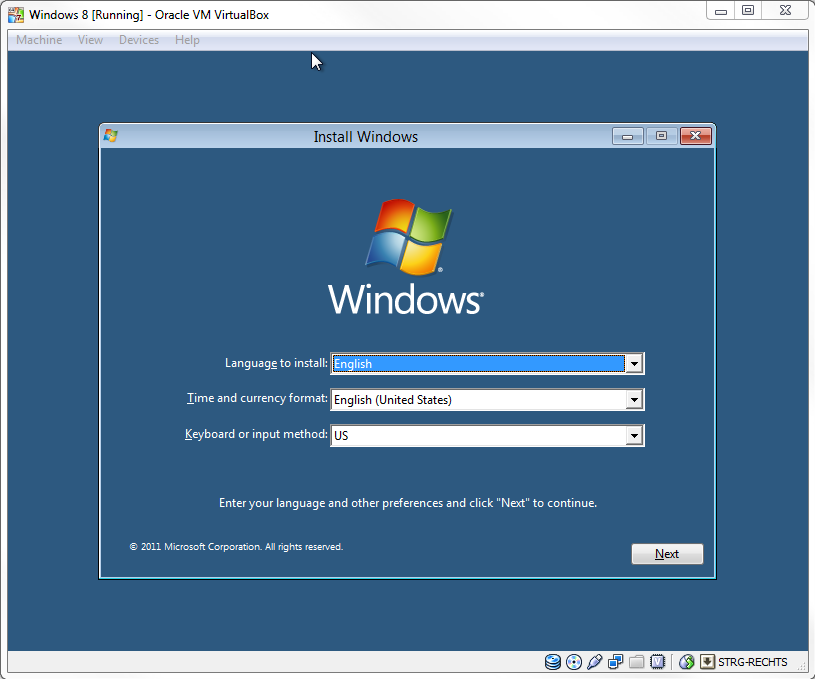
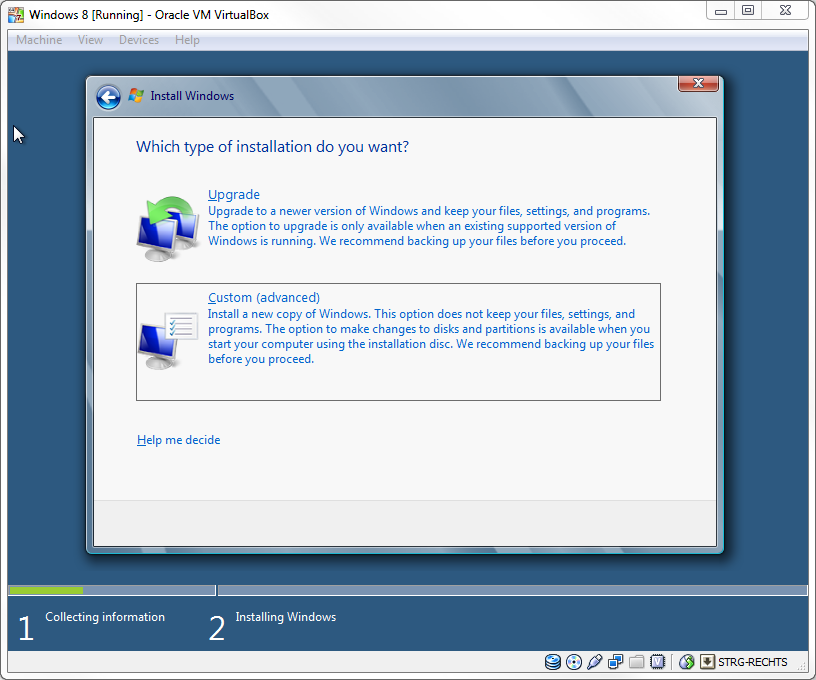
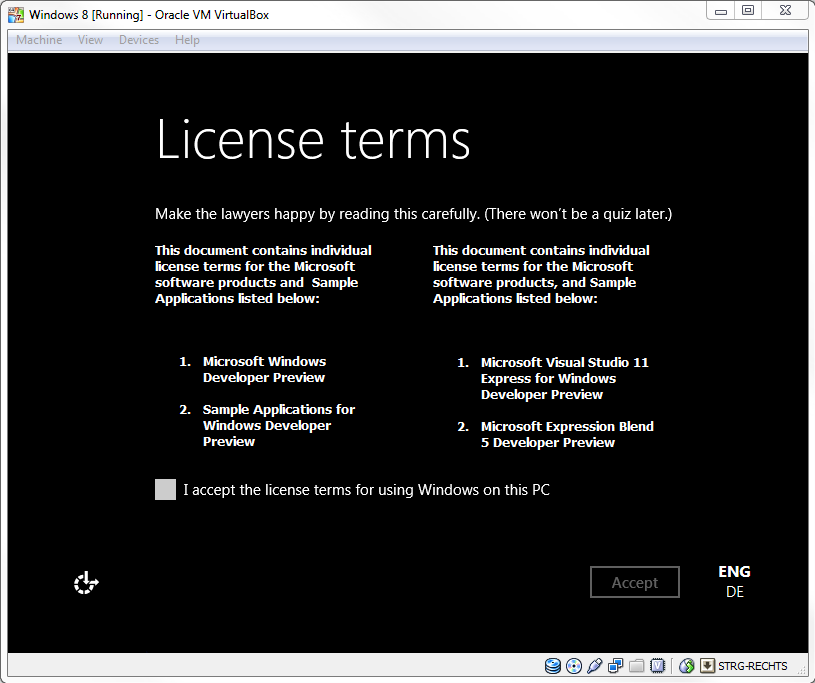
After setting up the basic language and keyboard options and accepting the license terms, you should select to do a custom install:
Select the hard disk we created before on the next screen (which should show as "Disk 0 Unallocated Space") and hit "Next" to start the copy process. For me the installation process took less time than creating the virtual hard disk before, if proceeded with the first reboot after just a few minutes.
After that first boot it seems Windows detects some more devices and finishes the configuration of the system, and there you go - after the second reboot you are only one last step away from the Windows 8 experience and need to accept the license terms for the developer preview (already in Metro style). Microsoft really does show a sense of humor here :).
Setting up Windows 8
Once started for the first time, Windows 8 guides you through some basic setup steps, for example to pick a name for your PC, and set up some basic options for Windows Update and privacy policies.

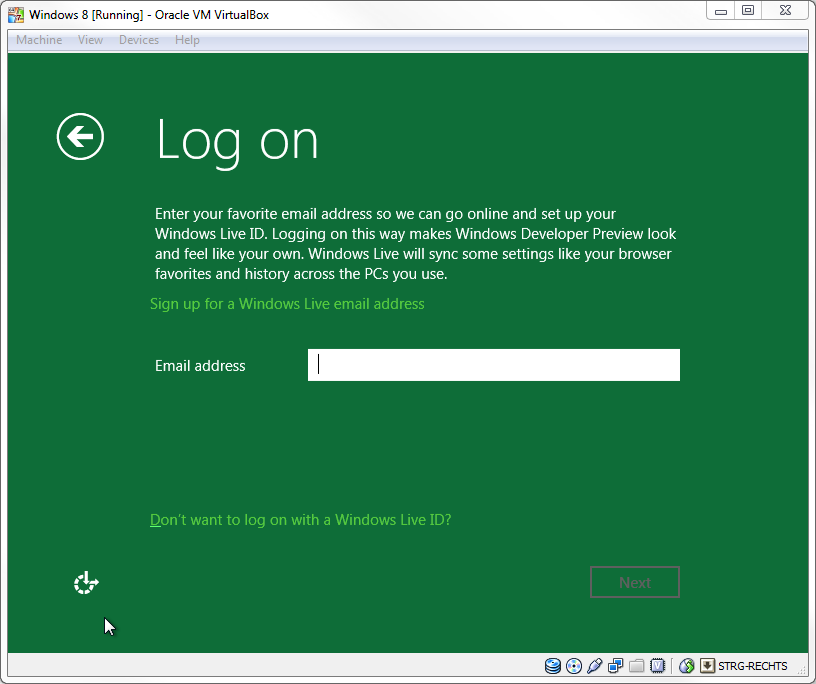
The new cloud integration features of Windows 8 become apparent when you reach the following screen, where you can log in with a Windows Live ID to sync your settings across the PCs you use.
You can even create a new Live ID from within that start screen - very convenient.
A little while later you are presented with the start screen:
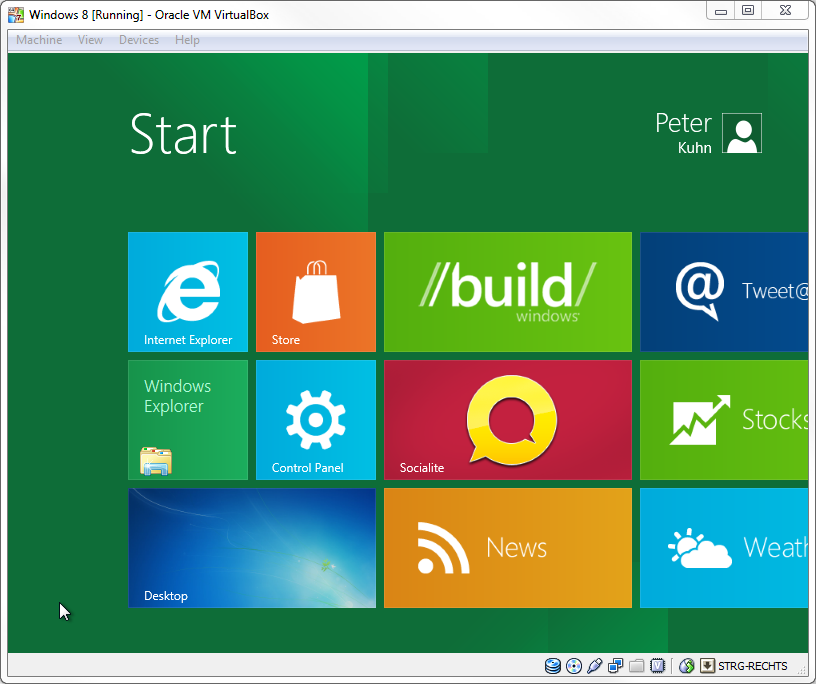
One last thing to do is to change the screen resolution. Most likely it is set to something too low (800x600 in my case). **This will prevent most applications on the start screen from launching **(you will find that simply nothing happens when you click their tiles). So go to the desktop using the lower left icon in the screenshot above, and change the resolution to something better like you would do on Windows 8, and you will be able to launch these applications correctly.
Now go ahead and have fun with Windows 8 ;).
Additional Notes
One additional thing I came across is that you should not use the "close" option of VirtualBox to shut down the machine. It will only show the lock screen of Windows 8 without actually powering off, and I had a lot of flickering after that. Instead, use the shutdown feature of Windows 8 for this. You can access this for example by logging off (using your profile at the top right on the start screen) and then using the "turn off" icon at the bottom right on the logon screen. Sometimes logging off takes a long time and doesn't seem to work (returns to the start screen) - simply try it again then.
Appendix: Custom/Widescreen Resolutions
For those guest operating systems that are officially supported by VirtualBox, you have the comfort of "guest additions" that add certain features to the virtual machine. As you will see, even if you try to use compatibility settings and other workarounds, the guest additions will not integrate correctly with Windows 8, and that will result in certain problems, for example with the VM adapting to the host screen resolution correctly.
Luckily, there is a workaround to support custom solutions, so you can run the VM in full screen and use e.g. your widescreen monitor to its full extend. First of all, make sure to start VirtualBox, but do not start your Windows 8 virtual machine. If it's already running, power it off first.
Then, open a command prompt on your computer and navigate to the installation folder of VirtualBox, which usually should be something like "C:\Program Files\Oracle\VirtualBox". Make sure that the command prompt is started with the same rights and user account like VirtualBox itself, or the settings won't be persisted correctly. Execute the following command:
VBoxManage.exe setextradata "[Virtual Machine Name]"

  CustomVideoMode[Number] [xRes]x[yRes]x[colorDepth]
That looks a bit cryptic, so let's explain it a bit. First of all you have to pass in the name of your virtual machine, which if you don't remember can be seen directly on the detail page of the machine in VirtualBox. Then you tell the manager that you want to add a custom video mode. You can add multiple of these modes if you want, which is indicated by the "[Number]" placeholder above. So you can have "CustomVideoMode1", "CustomVideoMode2" and so on. Finally you have to define the actual values of the video mode you want to define, which is the horizontal and vertical size as well as the color depth.
As an example, if you wanted to add a custom video mode of 1920x1080 pixels with 32-bit color depth to your virtual machine "Windows 8", the command would look like:
VBoxManage.exe setextradata "Windows 8"

  CustomVideoMode1 1920x1080x32
After that, you can power on the virtual machine and can then see that you will have this new resolution available in the screen resolution settings in Windows Control Panel:
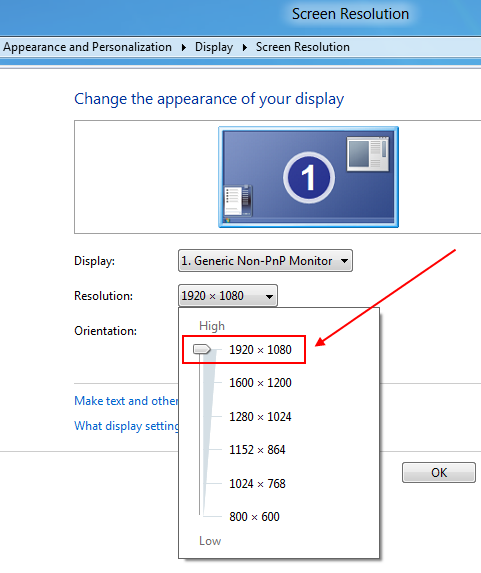
Setting this resolution is permanent, which means the guest operating system will remember it on the next reboot and set it automatically.
Tags: VirtualBox · Windows 8