
Installing Windows 8 Developer Preview as bootable VHD
Published on Wednesday, September 14, 2011 2:40:00 PM UTC in
Tools

This tutorial is fully compatible with Windows 8 Consumer Preview (released Feb 29th, 2012).
Minutes before I submitted my previous article that talks about installing Windows 8 in a virtual machine using VirtualBox, Scott Hanselman posted an article of his own about how he installed Windows 8 into a bootable VHD. This is a nice approach because it yields in much better performance. Only the hard disk is virtualized, not the rest of the hardware, so you benefit from the full power of your CPU and video card without creating a real dual boot setup or even upgrading your system completely. The drawback is that you have to boot into that Windows 8 VHD separately, whereas the installation with VirtualBox allows you to run Windows 8 within your existing system, and you can switch back and forth between both in the blink of an eye.
Two Alternatives
Scott mentions that there are half a dozen ways to create such a bootable VHD. But generally those alternatives can be categorized in two ways: First of all we have methods that setup the blank VHD and you then install the system manually into it. This process requires the creation of a separate USB or DVD boot media from the Windows 8 ISO you've downloaded and basically is the same experience like when you install the operating system on a blank computer – you go through all the required steps and reboots as usual, with the only exception that you use the VHD as target disk drive instead of a physical disk. Scott's article describes exactly that.
The other methods create the full VHD (including the desired target operating system) without the need to manually boot from an installation media and go through all of the installation steps. This process is known as "sysprepping" and creates an "almost finished" system in the VHD. When you boot it up for the first time, you have a similar experience to what happens when you buy a computer from an OEM: only some minor final steps have to be performed, like detecting drivers, accepting license agreements, setting the computer name, and you're done. This is a cool solution especially if you often want to start over from a really fresh installation, probably on different machines. But the drawback is that the involved steps usually involve some serious administrator kung fu. Scott has an article on that too, which can be found here (for Windows 7). As you can see it involves several steps and additional tools you have to download, which is not exactly straight forward. I found it especially annoying that you need to download, extract and install a whopping 1.66GB ISO package named "Windows Automated Installation Kit (AIK)" just to retrieve another command-line tool of < 1 MB that is required for the process.
After some digging around I found a simpler method for all this, so if you're interested in booting Windows 8 Developer Preview from a VHD and don't want to go through the manual steps Scott describes, read on.
Disclaimer
I have used this method, utterly fearless, on my main development machine. I worked like a charm and ultimately allowed me to boot into both my already existing Windows 7 system as well as the Windows 8 VHD. That however doesn't mean that it's going to work as smoothly for everybody else; I don't take responsibility for any damage you do to your system when you follow these instructions. Everything described here comes without warranty, and all you do you do at your own risk.
Creating the VHD
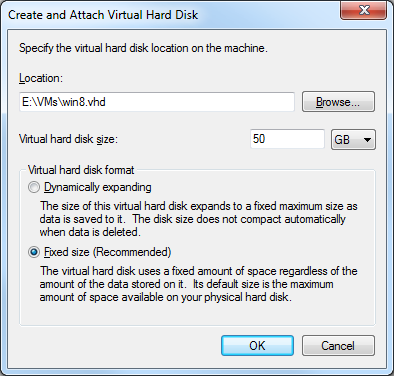
Instead of using command-line tools for this, I simply make use of the built-in features of Windows 7. Simply go to Control Panel => Administrative Tools => Computer Management and select the node labeled "Disk Management" there. From the Action menu you can now create a new VHD:
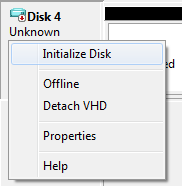
This will take a while, depending on the size of the virtual disk. Keep an eye on the status bar of the Computer Management window, it shows the progress. Once finished, the new disk will appear in the list of drives in the lower right panel. Right-click the drive and select "Initialize Disk".

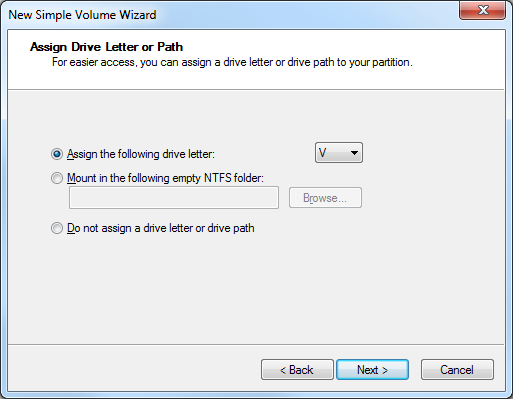
After that, you can start creating a partition on the disk. Select the "Unallocated" space, right-click and choose "New Simple Volume…" which will spawn a new wizard. Assign all the available size to the new volume, and also assign a drive letter:
Make also sure to format the partition (quick format is sufficient).
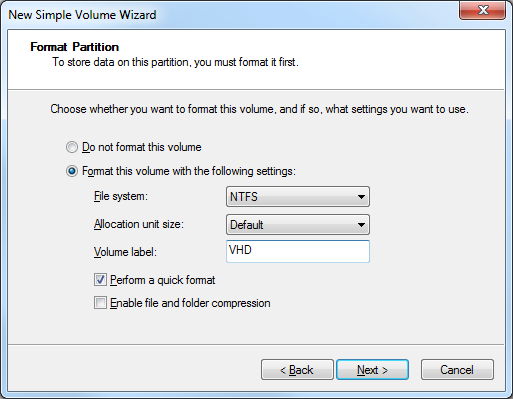
After that, you have created a new VHD that is now available through the assigned drive letter (until you detach it or until next reboot), in the above sample that is the letter "V".
Create the Windows Image
Instead of downloading several individual files and in particular the huge "Automated Installation Kit" I mentioned above, it is sufficient to use a single tool for this: "Install-WindowsImage". It is a PowerShell script that makes use of a built-in dll of Windows 7 to achieve the same the other tools do, but it's only a few kilobytes big and can be downloaded from the MSDN archive here. Make sure that you right-click the file after download and select "Unblock" from the properties to avoid running into security issues when you try to run the script.
What it of course needs is the source data from the Windows 8 ISO you downloaded. You have several possibilities for this: either mount that ISO file as virtual DVD drive using a tool like MagicDisc, or burn it on DVD, or extract it to a local disk using 7-zip or similar tools.
The process then is the following: open a PowerShell command prompt with elevated rights (right-click the start menu entry and select "Run as Administrator") and navigate to the path you have put the script into. Then execute the following command:
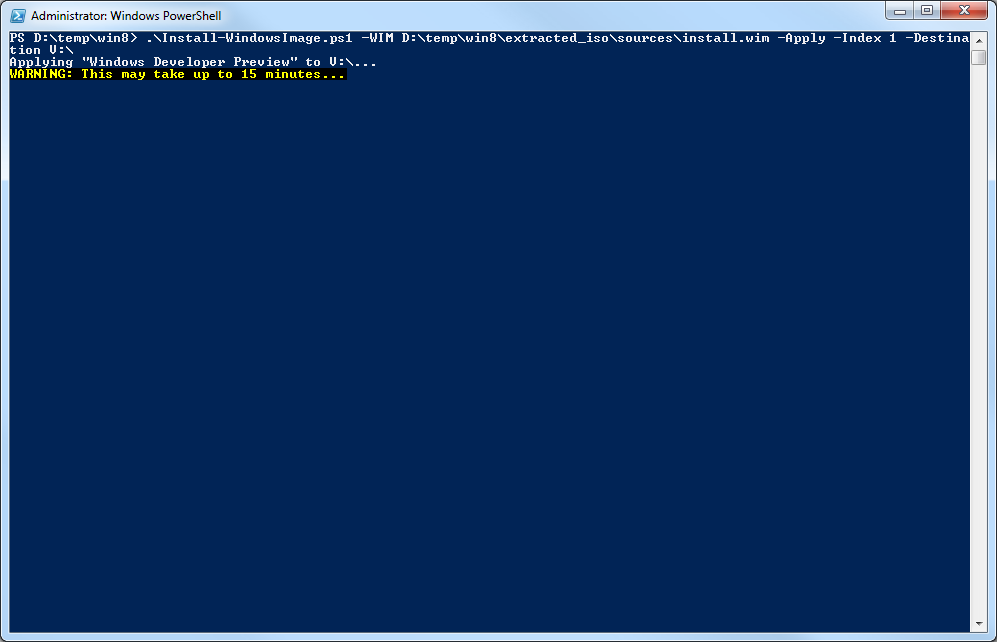
PS D:\temp\win8> .\Install-WindowsImage.ps1
  -WIM D:\temp\win8\extracted_iso\sources\install.wim
  -Apply
  -Index 1
  -Destination V:\
Let's break that down for a moment:
- WIM: Tells the script where to find the the source. This always is the "sources\install.wim" file of the Windows 8 ISO content; adjust the path to fit your needs. Note: Relative paths do not seem to work here and result in an error (thanks for finding this issue, Kunal!). Please use absolute paths when you specify the .wim source.
- Apply: the source content should be applied to the target
- Index: the index of the SKU contained in the source. The Windows 8 Developer Preview only has one, so "1" is the only option possible in this case (note: 1, not 0).
- Destination: the target where to apply the source to. This is the drive letter assigned to your VHD.
The process takes a few minutes, so grab a cup of coffee until it's finished.
Note: if this is the first time you're using PowerShell to run a script, you will receive an error like "Install-WindowsImage.ps1 cannot be loaded because the execution of scripts is disabled on this system". This is a security mechanism of PowerShell to prevent accidental execution of malicious scripts. You can use the following command to set this execution policy to something that allows execution of all local scripts and only digitally signed remote scripts. Setting this is a one-time thing and persisted permanently:
PS D:\temp\win8> Set-ExecutionPolicy RemoteSigned
Thank you Michael for pointing this out.
Booting from the VHD
Most tutorials now show you how to use BCDEdit to manipulate the boot menu of your computer to add an additional entry for the VHD. I won't do that simply because I couldn't find a way to make the Windows 7 bootloader actually load Windows 8 (which I would have preferred, given the pre-release nature of Windows 8). So BCDEdit alone is not sufficient, and booting the VHD will fail even if you add a seemingly correct boot menu entry. Instead, what I did was replace the existing boot files of Windows 7 with the ones that come with Windows 8.
This, although very simple to achieve, is probably is the most critical part of the tutorial, because now is the time you actually start screwing with your existing system. The Windows 8 bootloader is pretty smart and recognizes the existing Windows 7 installation (and also additional existing entries in the boot menu). Replacing the loader will merge the existing entries with a new one for Windows 8, which gives you the option to boot into both your existing Windows 7 installation as well as into the Windows 8 VHD. However, things may go wrong here, and there may be a chance you turn your system into a surprise box with hours of recovery fun by this last step – again: proceed at your own risk.
Open a command prompt with elevated rights and navigate to the Windows\System32 folder of your existing Windows 7 installation (not the one of the mounted VHD!). Then use the following command:

bcdboot.exe V:\Windows
This of course assumes that you've also used "V" as drive letter for your VHD.
And that's it! The next time you reboot, you will be presented with this nice new boot menu that let's you choose between your existing system and the Windows 8 VHD:
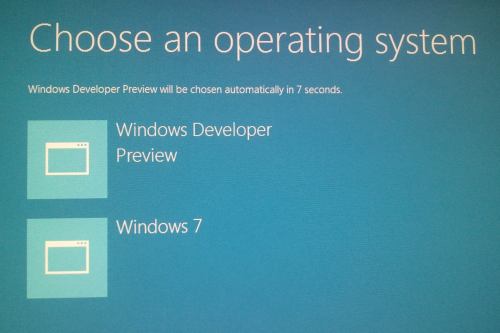
The first time you start Windows 8 it finishes the last steps of the setup as mentioned above, and then you're ready to go!
Additional Notes
When I first installed Windows 8 this way, it actually asked me for a key. I simply skipped over that screen, and later on the copy was listed as "Activated" in the system properties, so I think it's safe to ignore that.
Another thing I came across, which might be a problem with my particular hardware setup, was that I could not see the tiles on the Metro UI start screen. I fired up Windows Update, which actually found a few things to update and optional drivers to install, and after the next reboot the tiles showed correctly. So if you run into any problems on your hardware, make sure to run Windows Update first and get the latest bits from Microsoft.