
Windows Phone 7: Pinch Gesture Sample
Published on Thursday, January 13, 2011 12:56:00 PM UTC in
Programming

In my first article on Silverlight Show about XNA for Silverlight developers, I briefly mentioned the Gesture Listener of the Silverlight Toolkit that enables advanced gestures in Silverlight on the Windows Phone by using the XNA input libraries. Since then I've been asked about the pinch gesture in particular, so I'm providing a short example of how to use it.
The Gesture Listener
To use the gestures from the Silverlight toolkit, you add a gesture listener to the element you want to use for this in XAML. Before you can do that, make sure that you've added an assembly reference to the required toolkit dll in your project:
You also need to define the namespace in XAML so you can make use of it:
xmlns:toolkit="clr-namespace:Microsoft.Phone.Controls;assembly=Microsoft.Phone.Controls.Toolkit"
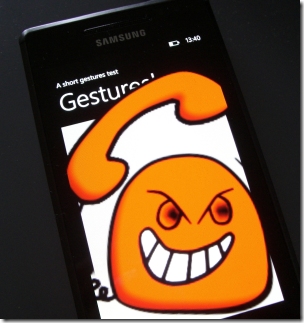
Now you can attach a gesture listener to the element you want to use. I've chosen an image control because it's a good demonstration object:
<Image x:Name="MyImage"
        Source="Phone.png">
    <Image.RenderTransform>
        <CompositeTransform x:Name="ImageTransformation" />
    </Image.RenderTransform>
    <toolkit:GestureService.GestureListener>
        <toolkit:GestureListener PinchStarted="OnPinchStarted"
                                    PinchDelta="OnPinchDelta" />
    </toolkit:GestureService.GestureListener>
</Image>
As you can see, attaching a listener is very simple. I've also added a transformation to the image which I use to do something with the input from the gesture listener later. Here is a quick overview of the available events you can use with the gesture listener:
- PinchStarted, PinchDelta, PinchCompleted: Allow you to keep track of pinch gestures, from the beginning until the user has completed the gesture. In my sample, I use both the Started and Delta events.
- Tap, DoubleTap: Allows you to keep track of tapping. Think of taps as "mouse button up" events. Please note that a double tap is always preceded by a single tap event, something you might want to keep in mind especially if you're interested in both events.
- DragStarted, DragDelta, DragCompleted: Can be used to implement dragging behavior for elements.
- Flick: A flick is a special gesture where the user performs a quick swipe on the screen. It is normally used for page turning effects and similar things.
- Hold: Occurs when the user has touched the screen and left their finger in place for a second. This can be used to show context menus, for example.
- GestureBegin, GestureCompleted: General events that are raised for any of the gestures.
Processing Pinch Events
When the user starts a pinch gesture, your event handler receives PinchStartedGestureEventArgs. These provide two useful properties: the distance between the two touch points involved, and the angle these two touch points form.
A nice helper method that is part of all gesture event args is "GetPosition". It allows you to get a point for each touch position, relative to the UI element you pass in (or relative to the visual root of your application if you pass in null). That way you can easily work in the coordinate system of a control without the need to do the transformations yourself.
I use the started event to store the initial values of my image transformation, and to determine the center point for the rotation and scaling. This allows zooming to and rotating around a particular part of the image.
private void OnPinchStarted(object sender, PinchStartedGestureEventArgs e)
{
    // store the initial rotation angle and scaling
    _initialAngle = ImageTransformation.Rotation;
    _initialScale = ImageTransformation.ScaleX;

    // calculate the center for the zooming
    Point firstTouch = e.GetPosition(MyImage, 0);
    Point secondTouch = e.GetPosition(MyImage, 1);

    Point center = new Point(firstTouch.X + (secondTouch.X - firstTouch.X) / 2.0,
                                firstTouch.Y + (secondTouch.Y - firstTouch.Y) / 2.0);

    ImageTransformation.CenterX = center.X;
    ImageTransformation.CenterY = center.Y;
}
Now, as long as the user holds their two fingers on the screen and moves them around, you will receive PinchDelta events, which you then can use to perform the actual image transformations:
private void OnPinchDelta(object sender, PinchGestureEventArgs e)
{
    // update the rotation and scaling
    ImageTransformation.Rotation = _initialAngle + e.TotalAngleDelta;
    ImageTransformation.ScaleX = _initialScale * e.DistanceRatio;
    ImageTransformation.ScaleY = ImageTransformation.ScaleX;
}
The event args you receive here are different from the ones you get in the started event. For the rotational part of the gesture, you can access the TotalAngleDelta property. It contains the angle delta between the angle of the touch points at the beginning of the whole gesture and the current touch points position. To translate that into a rotation for my image, I'm always using the original rotation angle I had stored before and add the current total delta to it.
For the scaling, you can make use of the DistanceRatio property. It contains the ratio of the current distance between the two involved touch points and the original distance when the gesture was started, and hence directly translates into a scaling factor I can use to scale the image.
Clipping
One additional question that came up was about clipping. When you implement what I did, then you can easily end up with transformations that cause the image to exceed the bounds of its container.
Of course the answer to that is clipping. You can define a clip geometry for any visual element to effectively crop its content. Unfortunately, there is no such thing as "crop to bounds" in Silverlight that you could use to automatically clip content to the bounds of its container. But implementing that (and make it reusable) is pretty simple by using a behavior:
public class AutoClipBehavior : Behavior<FrameworkElement>
{
    protected override void OnAttached()
    {
        AssociatedObject.SizeChanged += new SizeChangedEventHandler(AssociatedObject_SizeChanged);

        base.OnAttached();
    }

    protected override void OnDetaching()
    {
        AssociatedObject.SizeChanged -= new SizeChangedEventHandler(AssociatedObject_SizeChanged);

        base.OnDetaching();
    }

    private void AssociatedObject_SizeChanged(object sender, SizeChangedEventArgs e)
    {
        FrameworkElement element = AssociatedObject;

        if (element != null)
        {
            var rectangleGeometry = new RectangleGeometry();
            rectangleGeometry.Rect = new Rect(0, 0, element.ActualWidth, element.ActualHeight);
            element.Clip = rectangleGeometry;
        }
    }
}
For this, you need the System.Windows.Interactivity namespace, and add a reference to the assembly with the same name, which is part of the Expression Blend SDK. You should have these assemblies when you have the Windows Phone developer tools installed.
This behavior then can easily be attached to any element, like the container grid in my example:
xmlns:interactivity="clr-namespace:System.Windows.Interactivity;assembly=System.Windows.Interactivity"
xmlns:local="clr-namespace:ImageGesturesWP7"
<Grid x:Name="ContentPanel"
        Background="DarkGray"
        Grid.Row="1"
        Margin="12,0,12,0">
    <interactivity:Interaction.Behaviors>
        <local:AutoClipBehavior />
    </interactivity:Interaction.Behaviors>
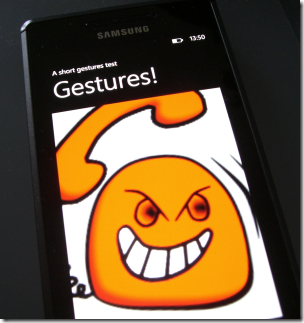
The result is that the image will be clipped when it exceeds the bounds of the container grid:
I hope this small example makes it easier for you to get started with gestures. You can download the source code of the sample here:
Tags: Silverlight · Windows Phone 7